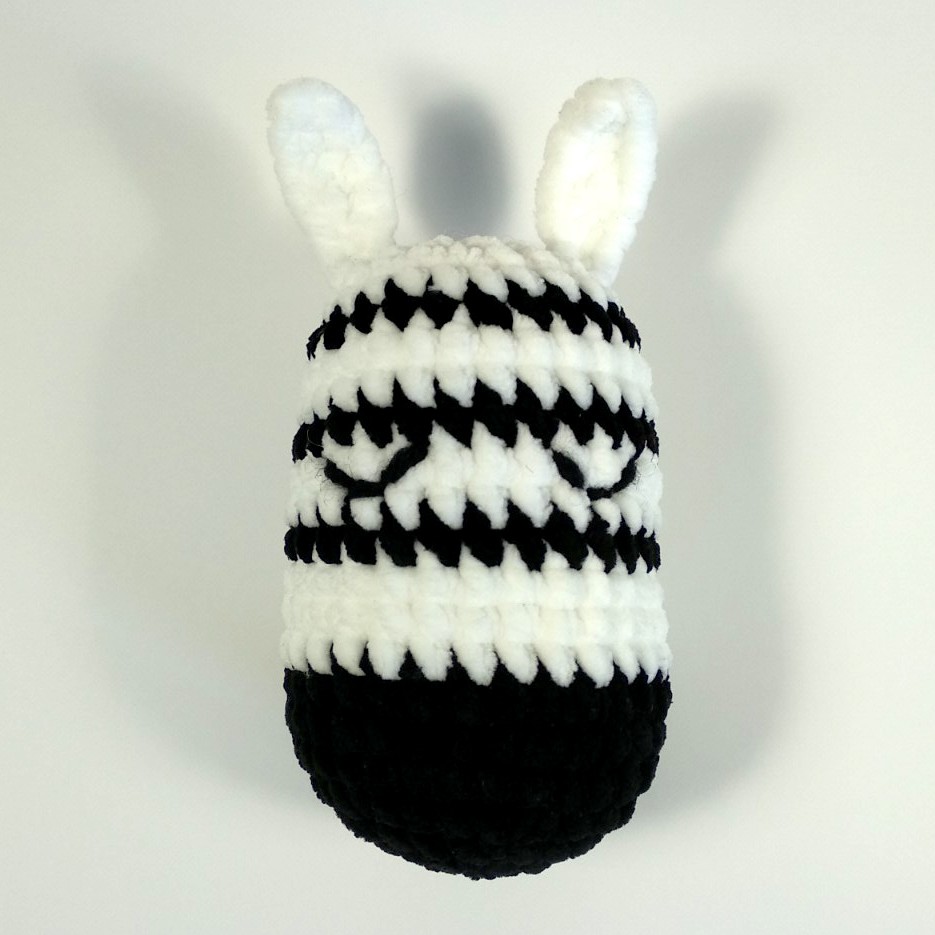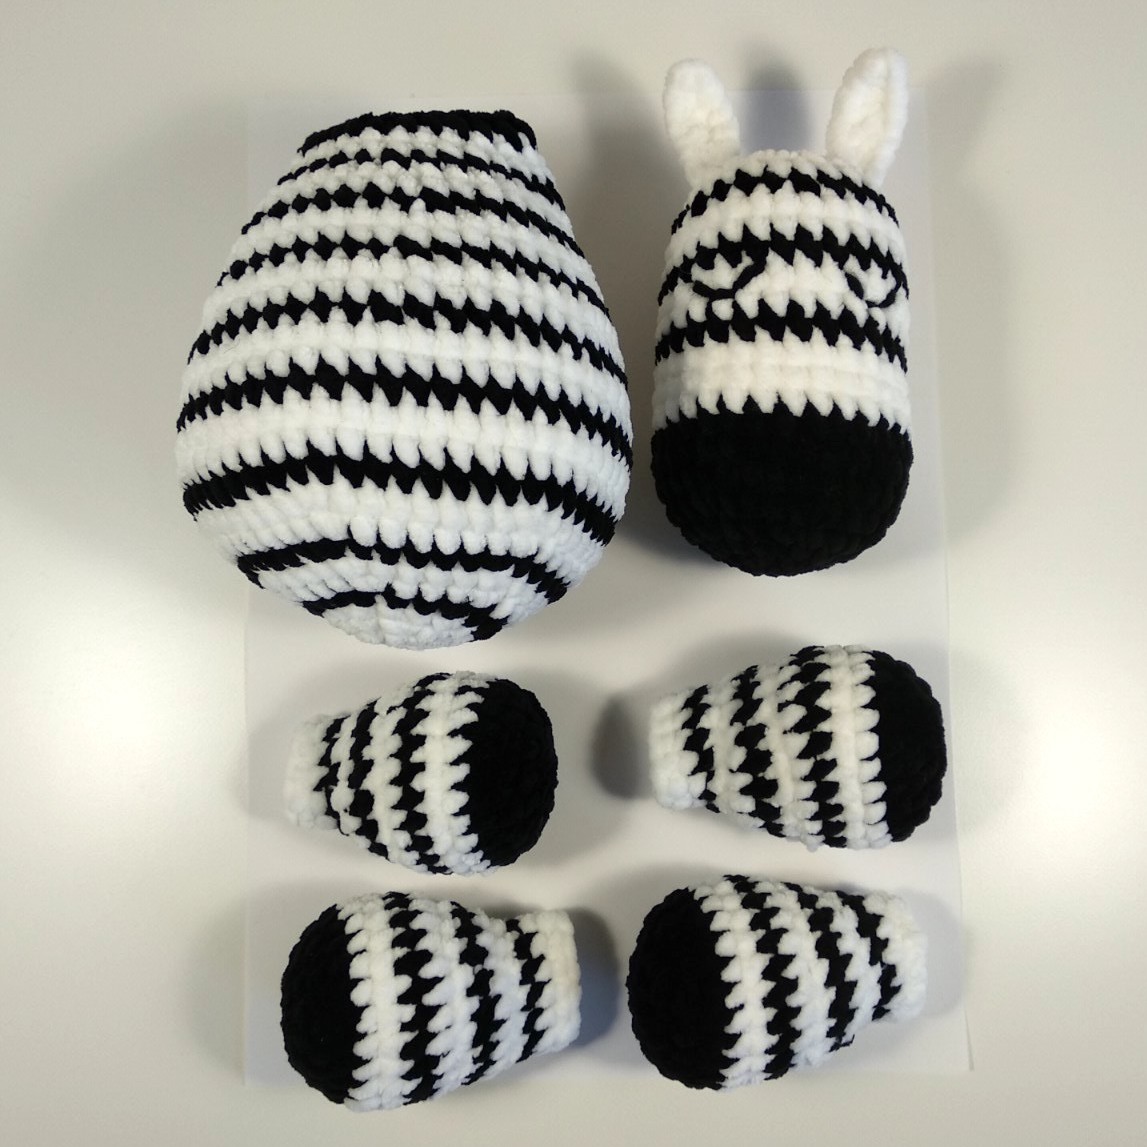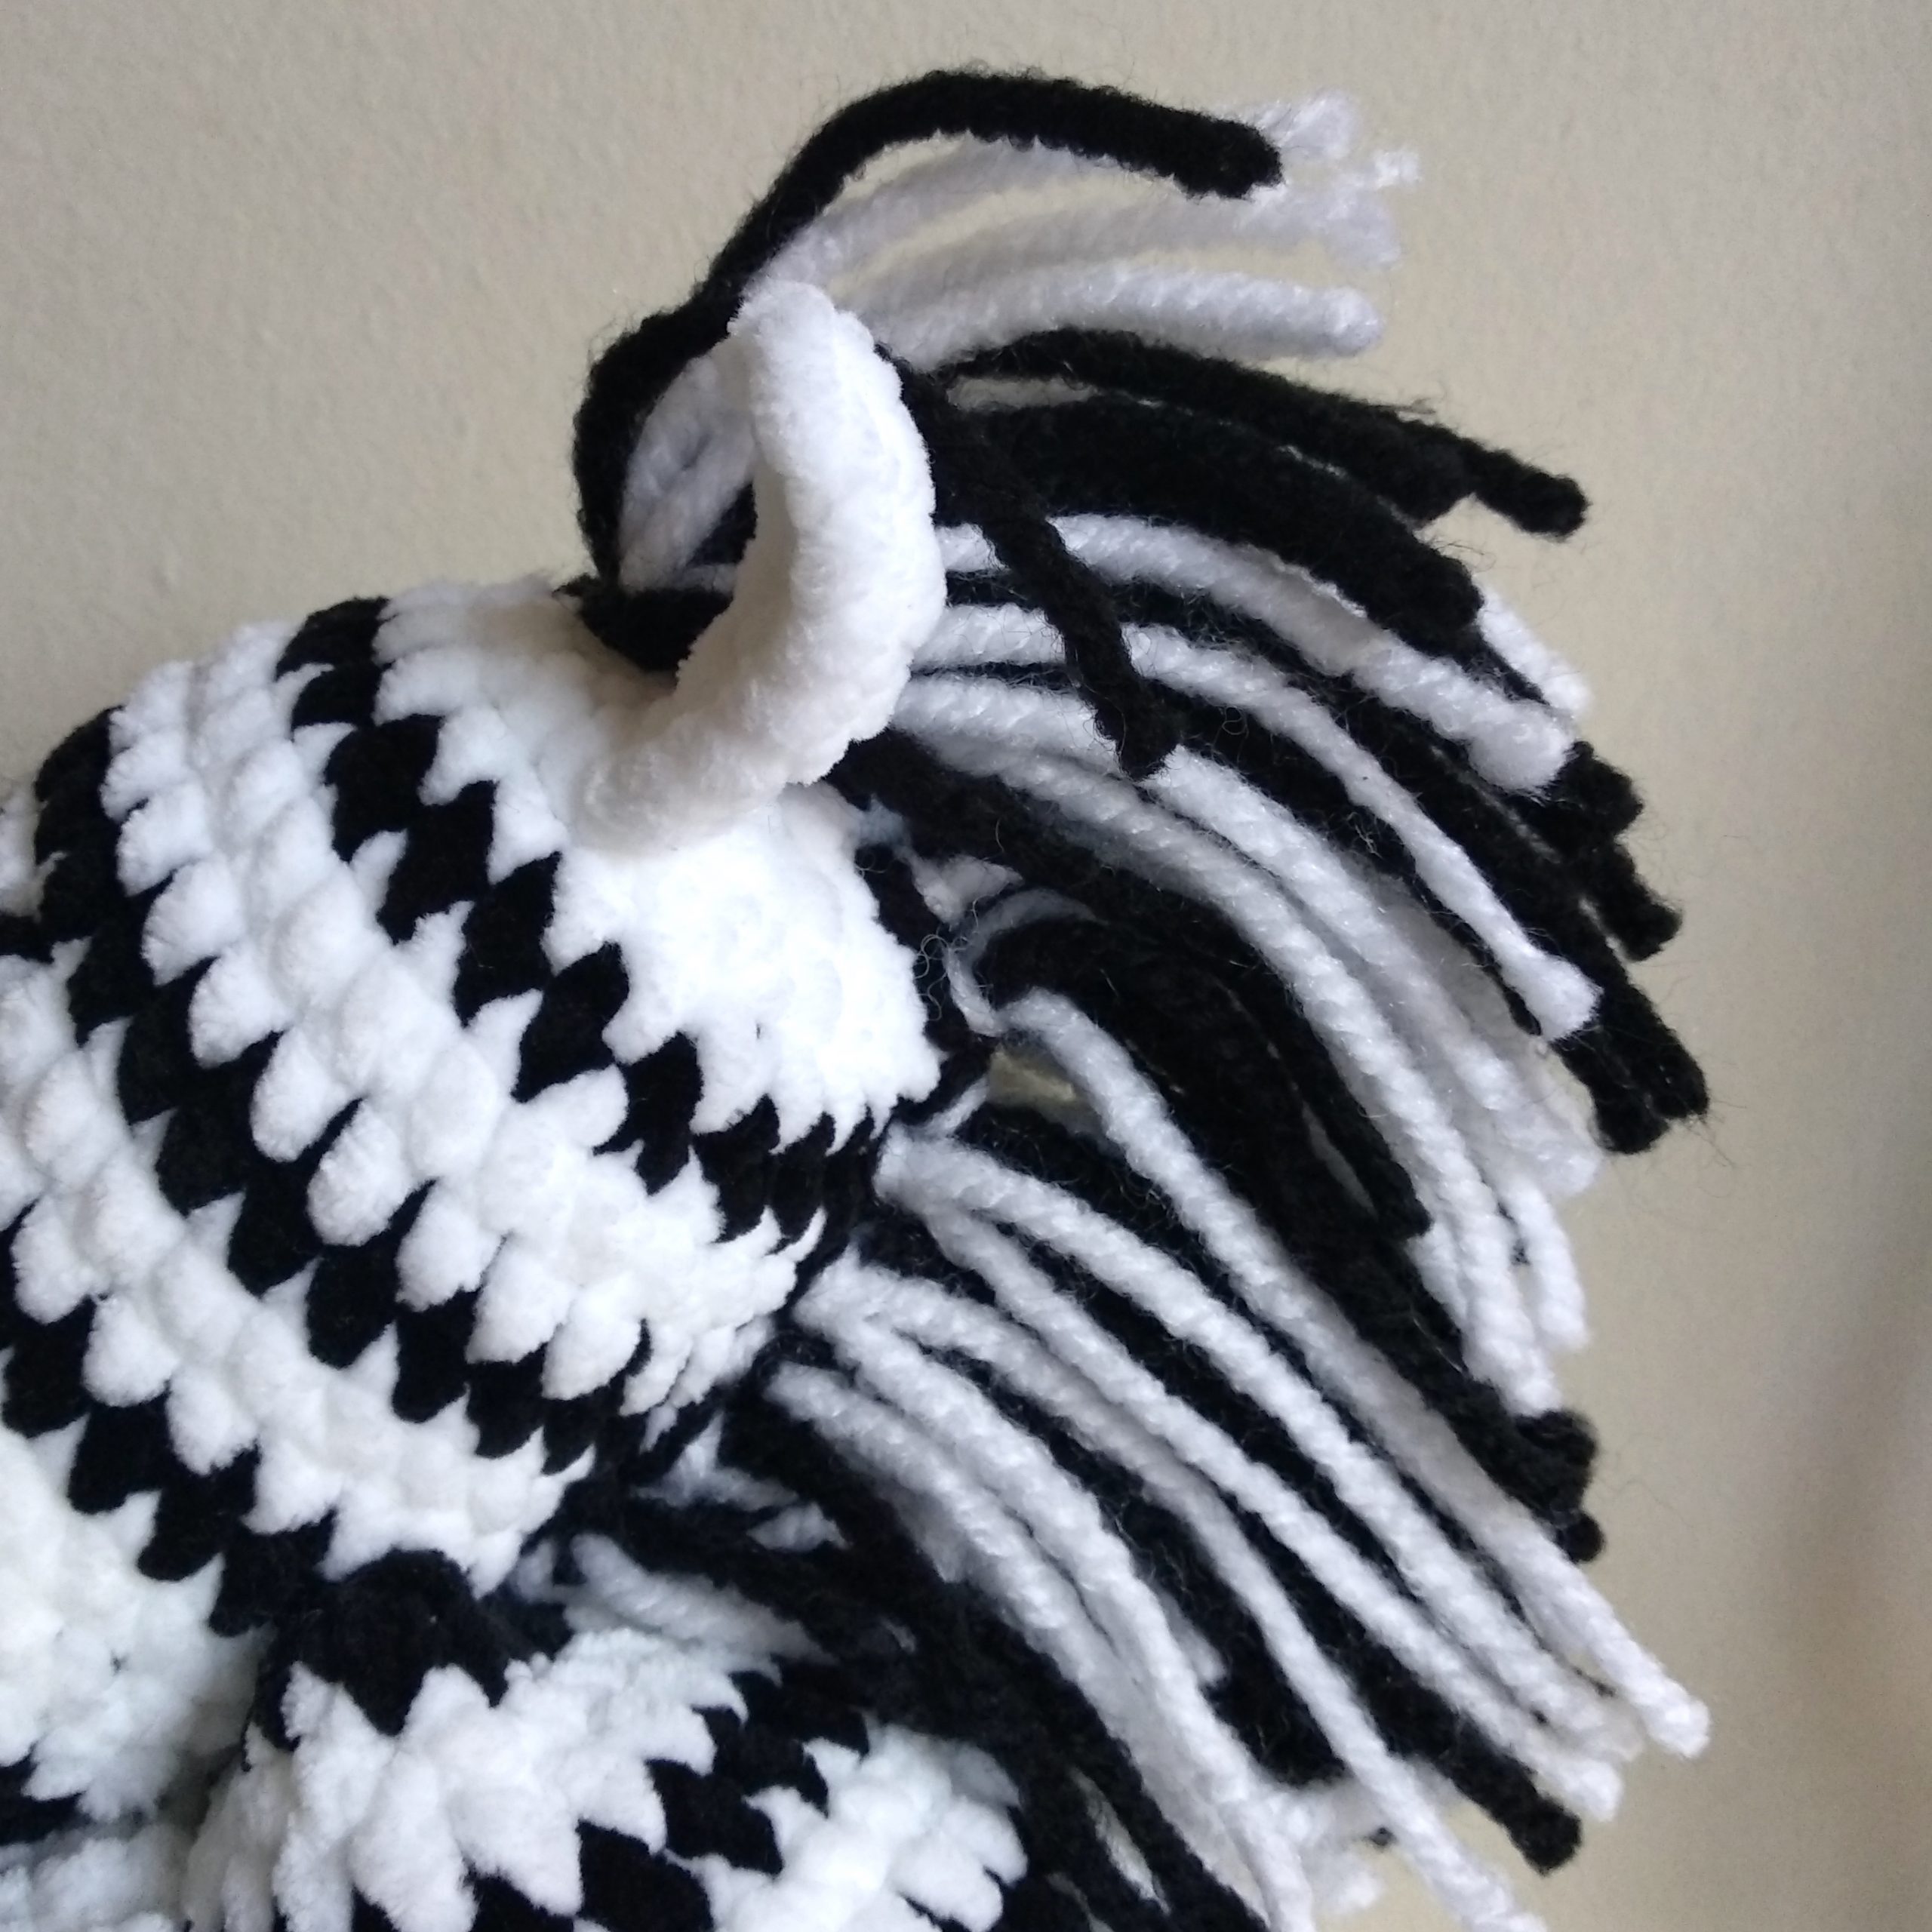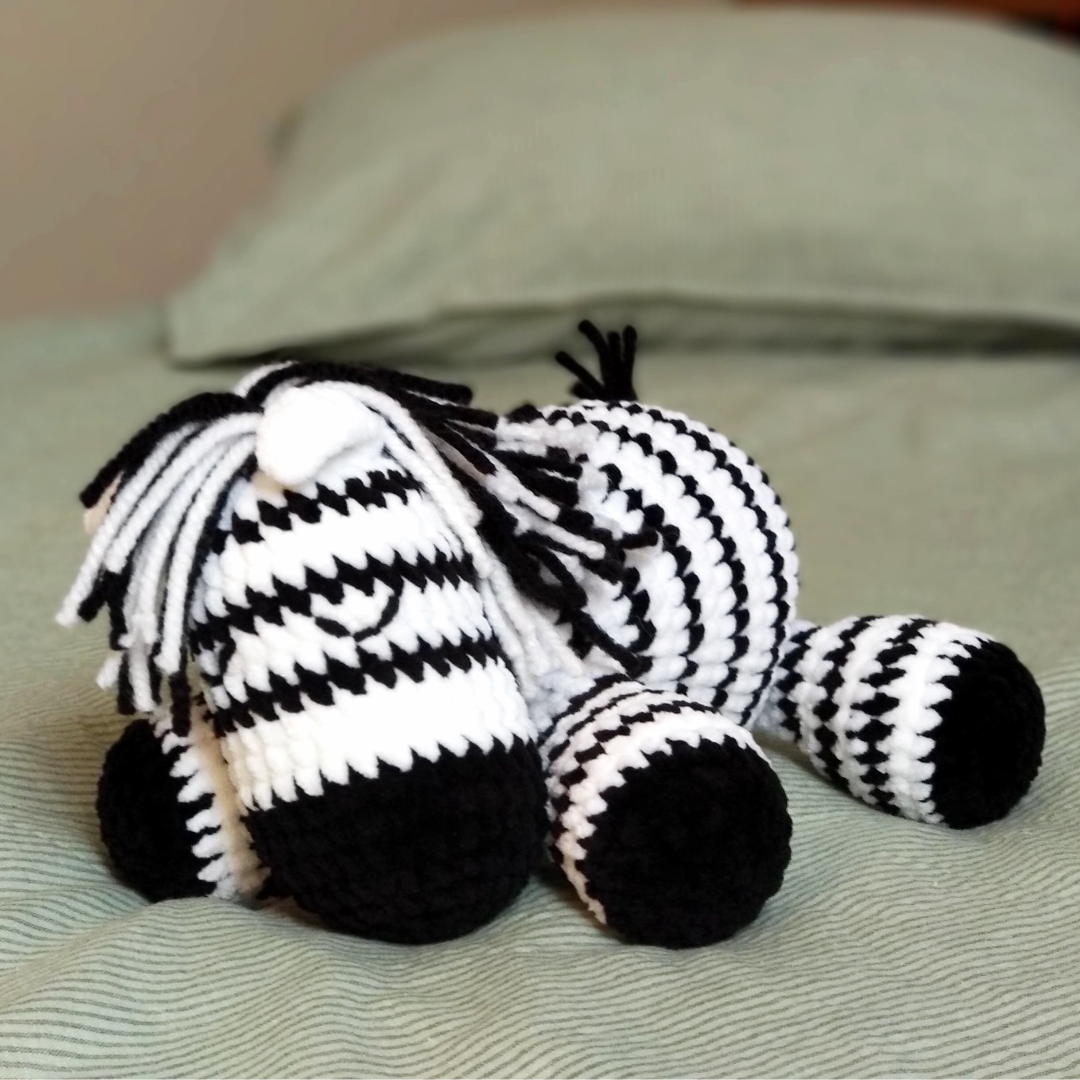
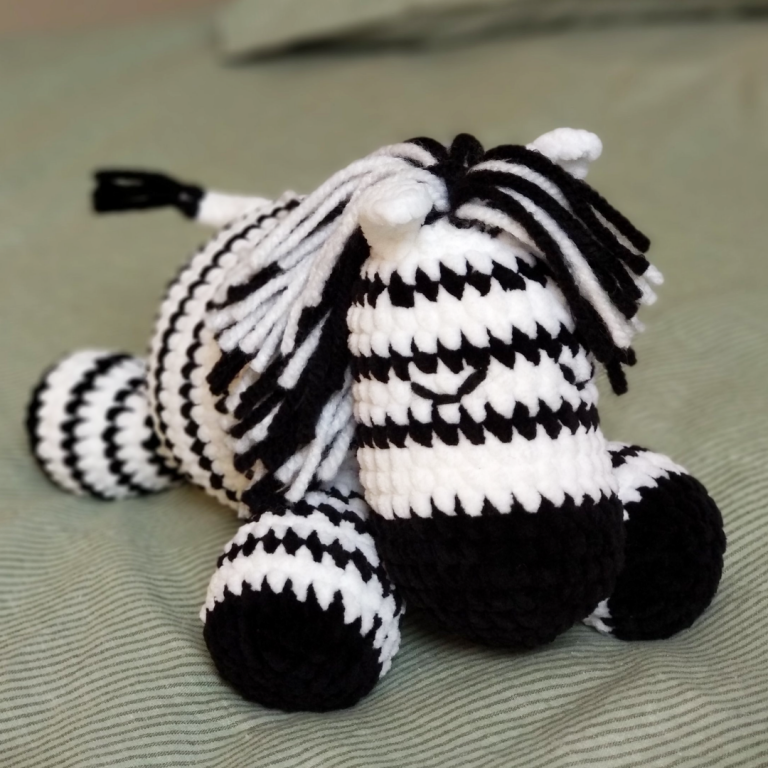
I made this zebra for a friend’s baby and I liked it so much that I decided to make a pattern. I wanted it to be extra fluffy so I chose a yarn with a velvet finish for the head, body, paws, and I used chunky wool yarn for the mane, tail hair, and embroidered eyes. I initially wanted it to have a short mane, but when I was done attaching the hair I actually liked the “dreadlocks” vibe it was giving me, so I left it as it was. So without further ado, I present to you Edgar, the Zebra.
First, we’ll make the snout. Starting with black yarn, increase on each row until you’ve reached 30 st, then do 3 more rounds at 30.
Rnd 1: ch 2, work 6 dc into first ch - 6 st.
Rnd 2: 2 dc in each st around - 12 st.
Rnd 3: [2 dc in next st, dc in next st] 6 times - 18 st.
Rnd 4: [2 dc in next st, dc in next 2 st] 6 times - 24 st.
Rnd 5: [2 dc in next st, dc in next 3 st] 6 times - 30 st.
Rnd 6-8: (3 rounds) dc in each st around - 30 st.
At the end of the last round, slip stitch and break the yarn. Insert white yarn on the first loop and start your 9th row. We’ll always sl st and break the yarn at the end (instead of simply changing the color). This will avoid the overlap of lines and colors.
Rnd 9-11: (3 rounds) dc in each st around - 30 st.
Rnd 12: Black yarn. dc in each st around. - 30 st.
Rnd 13-14: White yarn. (2 rounds) dc in each st around - 30 st.
Rnd 15: Black yarn. dc in each st around. - 30 st.
Rnd 16-17: White yarn. (2 rounds) dc in each st around - 30 st.
Rnd 18: Black yarn. [dc2tog, dc in next 3 st] 6 times - 24 st.
Rnd 19: White yarn. [dc2tog, dc in next 2 st] 6 times - 18 st.
Stuff head.
Rnd 20: [dc2tog, dc in next st] 6 times - 12 st.
Rnd 21: [dc2tog] 6 times - 6 st.
Rnd 22: [dc2tog] 3 times and fasten off - 0 st.
Embroider eyes between rounds 13 and 14. As an alternative, you can use safety eyes.
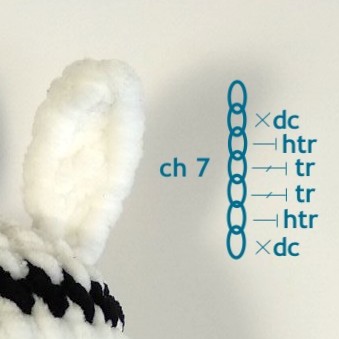
Rnd 1: ch 7, insert hook into previous st and dc, htr in next st, tr in next 2 st, htr in next st, dc in next st. Fasten off.
Attach both ears to the head.
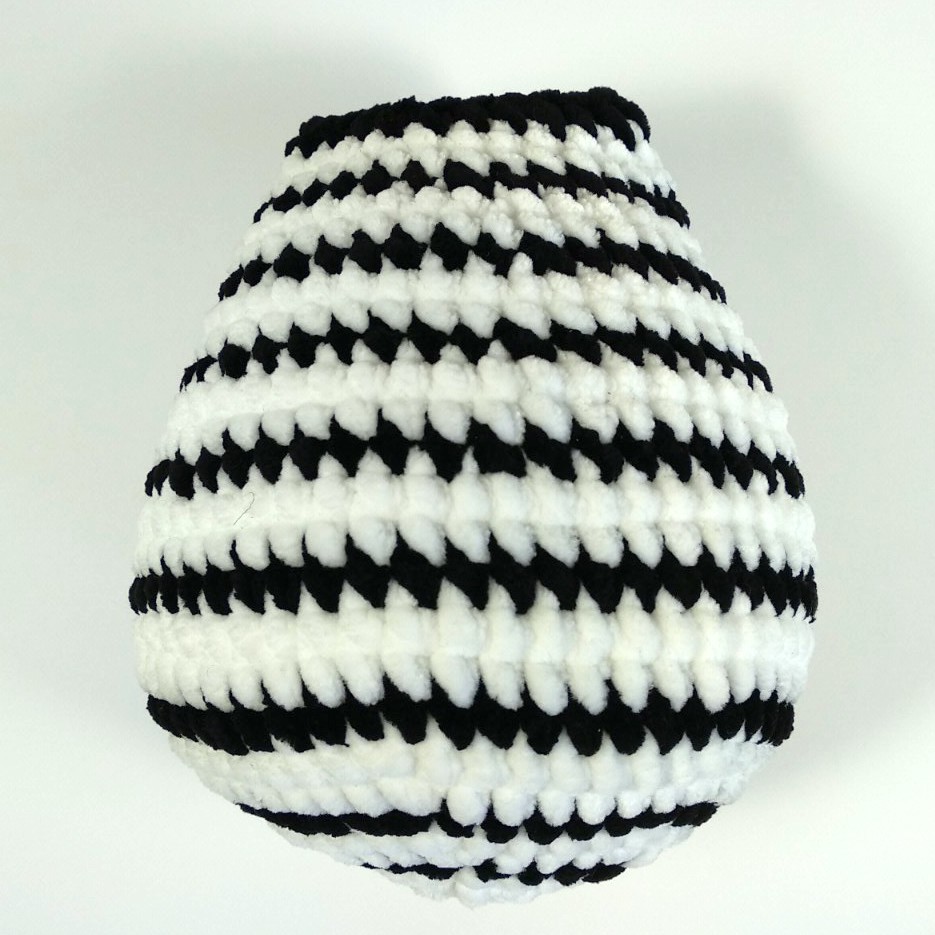
We will start from the bottom and will work all the way to the neck. Start with white yarn.
Rnd 1: White yarn. ch 2, work 6 dc into first ch - 6 st.
Rnd 2: 2 dc in each st around - 12 st.
Rnd 3: [2 dc in next st, dc in next st] 6 times. sl st at the end and break yarn. - 18 st.
Rnd 4: Black yarn. [2 dc in next st, dc in next 2 st] 6 times - 24 st.
Rnd 5: White yarn. [2 dc in next st, dc in next 3 st] 6 times - 30 st.
Rnd 6: White yarn. [2 dc in next st, dc in next 4 st] 6 times - 36 st.
Rnd 7: Black yarn. [2 dc in next st, dc in next 5 st] 6 times - 42 st.
Rnd 8: White yarn. [2 dc in next st, dc in next 6 st] 6 times - 48 st.
Rnd 9: White yarn. [2 dc in next st, dc in next 7 st] 6 times - 54 st.
Rnd 10: Black yarn. dc in each st around - 54 st.
Rnd 11-12: White yarn. dc in each st around - 54 st.
Rnd 13: Black yarn. dc in each st around - 54 st.
Rnd 14-15: White yarn. dc in each st around - 54 st.
Rnd 16: Black yarn. dc in each st around - 54 st.
Now we will start decreasing until we reach 30 st. We’ll decrease in every second white row. This is to avoid dc2tog when we just changed the color. It should give a better appearance.
Rnd 17: White yarn. dc in each st around - 54 st.
Rnd 18: White yarn. [dc2tog, dc in next 6 st] 6 times - 48 st.
Rnd 19: Black yarn. dc in each st around - 48 st.
Rnd 20: White yarn. dc in each st around - 48 st.
Rnd 21: White yarn. [dc2tog, dc in next 5 st] 6 times - 42 st.
Rnd 22: Black yarn. dc in each st around - 42 st.
Rnd 23: White yarn. dc in each st around - 42 st.
Rnd 24: White yarn. [dc2tog, dc in next 5 st] 6 times - 36 st.
Rnd 25: Black yarn. dc in each st around - 36 st.
Rnd 26: White yarn. dc in each st around - 36 st.
Rnd 27: White yarn. [dc2tog, dc in next 4 st] 6 times - 30 st.
Rnd 28: Black yarn. dc in each st around - 30 st.
Stuff the body. Then flatten the neck and sew both sides together to close the body making a line.
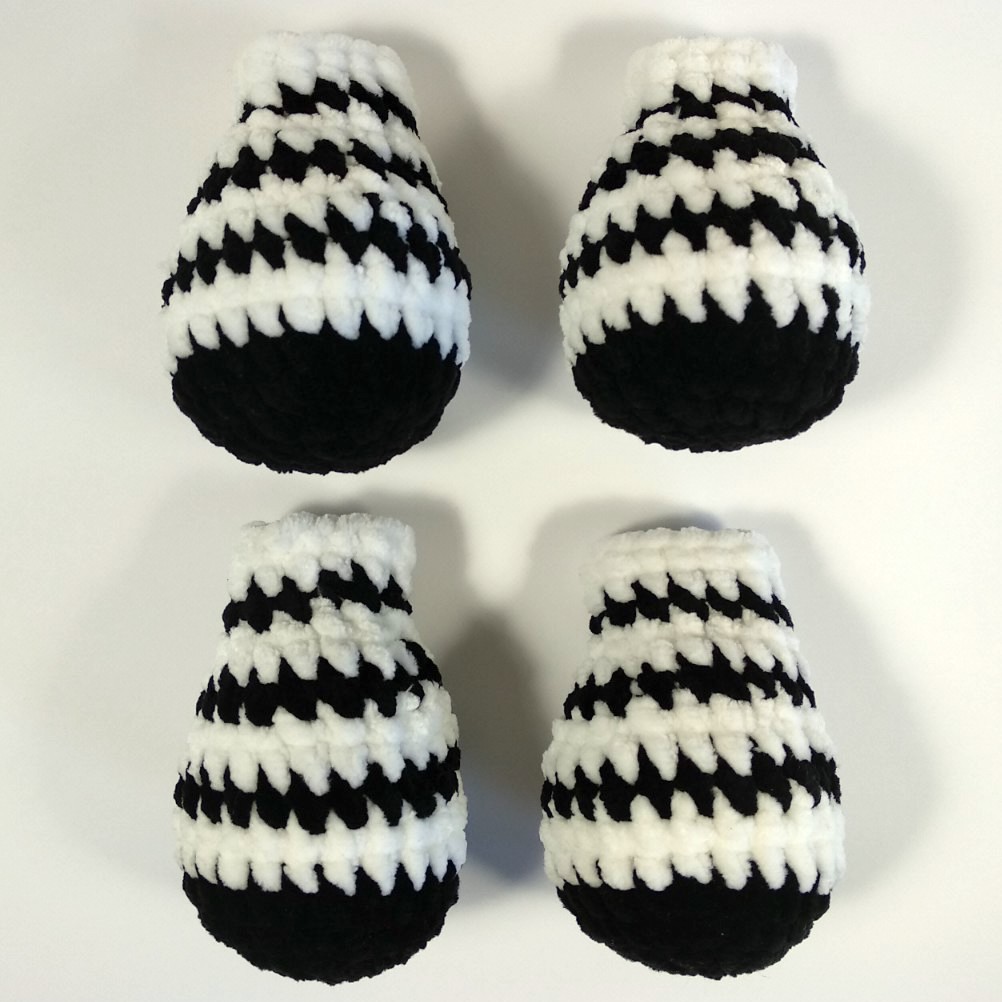
Start with black yarn.
Rnd 1: Black yarn. ch 2, work 6 dc into first ch - 6 st.
Rnd 2: 2 dc in each st around - 12 st.
Rnd 3: [2 dc in next st, dc in next st] 6 times - 18 st.
Rnd 4: [2 dc in next st, dc in next 2 st] 6 times - 24 st.
Rnd 5-6: White yarn. (2 rounds) dc in each st around - 24 st.
Rnd 7: Black yarn. dc in each st around - 24 st.
Now we will start decreasing until we reach 12 st. We’ll decrease in every second white row just like we did with the body.
Rnd 8: White yarn. dc in each st around - 24 st.
Rnd 9: White yarn. [dc2tog, dc in next 4 st] 6 times - 18 st.
Rnd 10: Black yarn. dc in each st around - 18 st.
Rnd 11: White yarn. dc in each st around - 18 st.
Rnd 12: White yarn. [dc2tog, dc in next 3 st] 6 times - 12 st.
Rnd 13: Black yarn. dc in each st around - 12 st.
Rnd 14-15: White yarn. (2 rounds) dc in each st around - 12 st.
Flatten the end and sew both sides together making a line. Attach all 4 legs to the body. Sew the bottom paws between rows 8 and 9 and the upper paws between rows 23 and 24, leaving around 4 stitches in between.
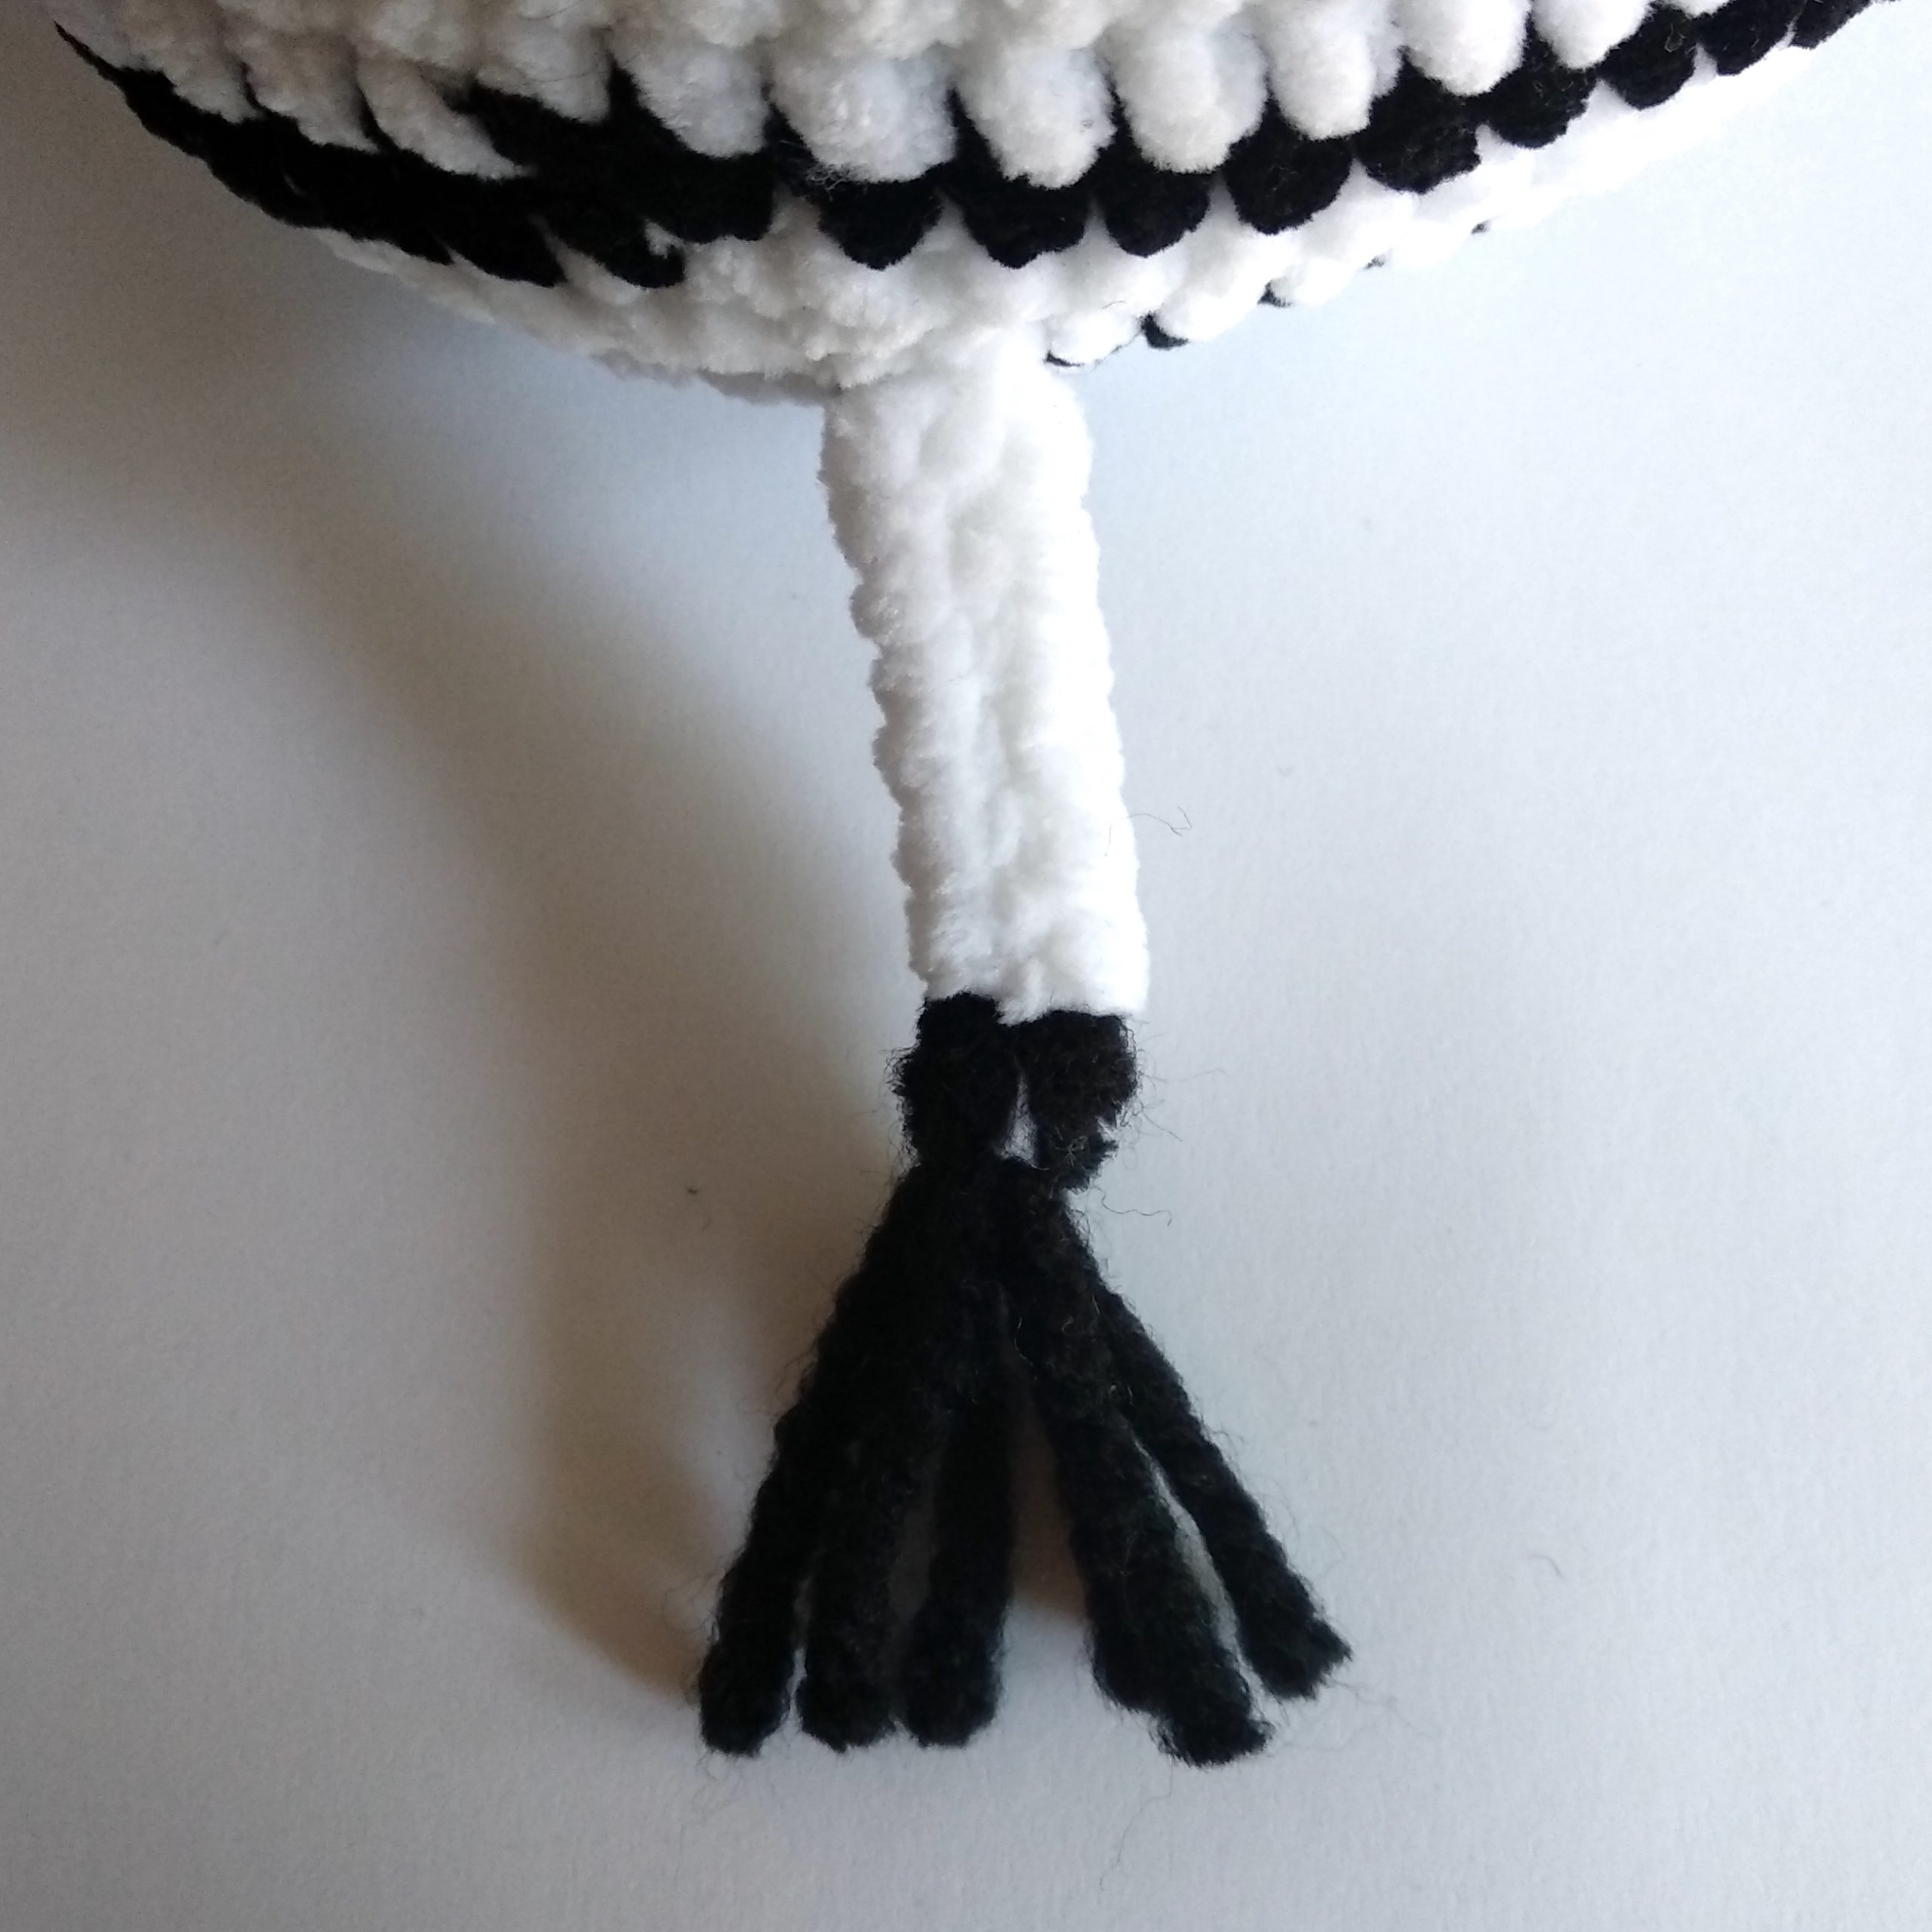
Tail: ch 7, insert hook into previous st and dc in next 6 st. Attach to the body. Cut 3 strings of black yarn and fold them. Insert the 3 loops into the end of the tail, pass the loose ends through the loops and pull. Trim the ends to make them even.
Mane: Cut strings of approximately 7 in (18cm) in both colors. Pair a white and a white string and fold them together. Insert the hook in a stitch in the head and pull the 2 loops through the stitch. Pass the loose ends through the loop and pull to tie it up. Repeat the process until you have a full mane. Trim the ends to make them even.